Spring @Async with Http Session

( 이미지 출처 : https://upload.wikimedia.org )
이 글은 Spring @Async 비동기처리 에서 알려드린 Spring @Async의 제약사항 중 thread 분리에 의해 HttpServletRequest에 접근 못하는 상황을 다시 한번 살펴보고 해결방법에 대해서 알려드립니다.
SpringBoot 를 사용했으며 java based configuration 방식을 이용했습니다.
Spring @Async Session 샘플을 Github에 올려뒀으니 참고하시기 바랍니다.
위의 샘플은 Spring @Async 비동기처리 샘플을 기반으로 작성하되 Spring Boot 버전을 높였습니다.
@Async with Http Session
문제 제기
Spring @Async를 쓰면 업무로직 변화없이 쉽게 비동기 처리를 진행 할 수 있습니다. 하지만 업무로직에서 HttpSession 혹은 HttpServletRequest를 사용한다면 문제가 발생합니다. 일단 비동기를 호출한 thread가 먼저 종료되면 HttpServletRequest의 scope도 함께 종료되어 비동기로 실행 된 로직에서는 사용에 실패하게 됩니다. 또한 Spring RequestContextHolder를 이용해서 HttpServletRequest에 접근하는 메소드를 비동기로 처리하게 되면 thread가 달라져서 Spring RequestContextHolder를 이용하는데 실패하게 됩니다.
물론 HttpServletRequest에서 필요한 값들을 모아서 VO(Value Object)로 만들고 파라미터로 service에게 넘긴다면 문제가 되지 않습니다.
하지만 우리는 필요에 의해 Spring RequestContextHolder를 이용한 controller, service, DAO 전역에서 HttpServletRequest에 직접 접근하는 방법을 사용하곤 합니다.
왜 그런 필요가 생기는지와 어떻게 직접 접근하는지에 대해서는 Spring RequestContextHolder - 어디서든 HttpServletReqeust 사용하기 글을 참고해주시기 바랍니다. 참고로 저는 logger, AOP, DAO 등에서 사용하기 위해서 주로 사용합니다.
@Service
public class GreetingService {

    Logger logger = LoggerFactory.getLogger(getClass());

    public void test() {

        String loggingCode = UUID.randomUUID().toString().replaceAll("-", "");

        logger.info("loggingCode {} is generated", loggingCode);

        Attribute attribute = new Attribute();
        attribute.setLoggingCode(loggingCode);

        SessionScopeUtil.setAttribute(attribute);

        logger.info("loggingCode {} is stored on Session Scope", loggingCode);

        method1();

        method2();
    }

    @Async("threadPoolTaskExecutor")
    public void method1() {
        try{
            Attribute attribute = SessionScopeUtil.getAttribute();
            String loggingCode = attribute.getLoggingCode();

            logger.info("method1() > Successfully received loggingCode {}", loggingCode);
        }catch(Exception ex){
            logger.info("method1() > Failed to receive loggingCode");
        }
    }

    @Async("executorWithSession")
    public void method2() {
        try{
            Attribute attribute = SessionScopeUtil.getAttribute();
            String loggingCode = attribute.getLoggingCode();

            logger.info("method2() > Successfully received loggingCode {}", loggingCode);
        }catch(Exception ex){
            logger.info("method2() > Failed to receive loggingCode");
        }
    }

}
test() 에서 loggingCode를 만들고 SessionScopeUtil에 보관 후 method1()과 method2()를 호출 합니다.
method1(), method2() 에서는 SessionScopeUtil에서 loggingCode를 꺼내서 로그에 남깁니다.
SesssionScopeUtil에 대해서는 Spring RequestContextHolder - 어디서든 HttpServletReqeust 사용하기 글을 참고해주시기 바랍니다. 간단히 설명드리면 SesssionScopeUtil에 보관한 attribute는 HttpServletRequest.setSession()에 보관되는 것과 동일하다고 보시면 됩니다.
즉, 다른 WAS에서도 동일한 SESSION_ID를 가진 호출을 받는다면 SessionScopeUtil을 통해서 동일한 attribute를 사용할 수 있습니다.
만약 mehtod1(), method2()가 모두 비동기가 아닌 동기방식으로 실행되었다면 당연히 모두 성공적으로 loggingCode를 로그에 남길 수 있었을 겁니다.
그런데 어떠한 이유로 method1()과 method2()를 비동기방식으로 변경해야된다면 업무로직 변경없이 @Async만 추가하면 원하는 결과가 출력되지 않습니다.
test() 와 method1(), method2()는 모두 다른 thread에서 실행 중이며 test()만 HttpServletRequest에 접근이 가능한 상황입니다.
하지만 평소 SesssionScopeUtil과 같이 유연성을 더해 Spring RequestContextHolder을 사용하고 있었다면 업무로직 수정없이 설정과 유틸리티 수정만으로도 해결이 가능합니다.
method1()를 비동기 처리하는 threadPoolTaskExecutor은 그냥 기본적인 Spring @Async으로 설정해서 처리실패하도록 하고 method2()를 비동기 처리하는 executorWithSession은 Session을 활용할 수 있도록 설정하겠습니다.
Result
SpringAsyncConfig 설정방법을 보여드리기 전에 테스트 결과를 먼저 설명드립니다.
2019-01-05 22:25:06,606 INFO i.d.s.h.GreetingService [http-nio-8080-exec-1] loggingCode 43815bedf5dc452ca1a8ea5b8a9aa256 is generated
2019-01-05 22:25:06,668 INFO i.d.s.h.GreetingService [http-nio-8080-exec-1] loggingCode 43815bedf5dc452ca1a8ea5b8a9aa256 is stored on Session Scope
2019-01-05 22:25:06,689 INFO i.d.s.h.GreetingService [Executor-1] method1() > Failed to receive loggingCode
2019-01-05 22:25:06,710 INFO i.d.s.h.GreetingService [ExecutorWithSession-1] method2() > Successfully received loggingCode 43815bedf5dc452ca1a8ea5b8a9aa256
test()는 http-nio-8080-exec-1 thread에서 실행됐고 method1()은 Executor-1 thread에서 실행되고 실패했습니다.
그리고 method2()는 ExecutorWithSession-1 thread에서 실행되고 loggingCode를 가져오는데 성공했습니다.
앞서 얘기 드린대로 추가기능이 설정된 executorWithSession은 SessionScopeUtil을 통해 loggingCode를 전달해주는 것이 확인됩니다.
SpringAsyncConfig
...(생략)

@Configuration
@EnableAsync(mode=AdviceMode.ASPECTJ)
public class SpringAsyncConfig {

    ...(생략)

    @Bean(name = "threadPoolTaskExecutor", destroyMethod = "shutdown")
    public Executor threadPoolTaskExecutor() {
        ThreadPoolTaskExecutor taskExecutor = new ThreadPoolTaskExecutor();
        ...(생략)

        return taskExecutor;
    }

    @Bean(name = "executorWithSession", destroyMethod = "destroy")
    public Executor executorWithSession() {
        ThreadPoolTaskExecutor taskExecutor = new ThreadPoolTaskExecutor();
        ...(생략)

        return new HandlingExecutor(taskExecutor); // HandlingExecutor로 wrapping 합니다.
    }

    public class HandlingExecutor implements AsyncTaskExecutor {

        private AsyncTaskExecutor executor;

        public HandlingExecutor(AsyncTaskExecutor executor) {
            this.executor = executor;
        }

        ...(생략)

        @Override
        public void execute(Runnable task) {
            Runnable runnable = createWrappedRunnable(task);
            executor.execute(runnable);
        }

        ...(생략)

        private Runnable createWrappedRunnable(final Runnable task) {
            Attribute attr = SessionScopeUtil.getAttribute();

            return new AttributeAwareTask(new Runnable() {
                @Override
                public void run() {
                    try {
                        task.run();
                    } catch (Exception ex) {
                        handle(ex);
                    }
                }
            }, attr);
        }

        ...(생략)
    }

    public class AttributeAwareTask<T> implements Callable<T>, Runnable {
        private Callable<T> callable;
        private Runnable runnable;
        private Attribute attribute;

        ...(생략)

        public AttributeAwareTask(Runnable task, Attribute attribute) {
            this.runnable = task;
            this.attribute = attribute;
        }

        ...(생략)

        @Override
        public void run() {
            AsyncScopeUtil.setAttribute(attribute);
            try {
                runnable.run();
            } finally {
                AsyncScopeUtil.removeAttribute();
            }
        }
    }


}
Spring @Async 비동기처리 글에서 설명드린 handler는 exception 처리를 위해서만 사용됐습니다. 이번에는 SessionScopeUtil에서 꺼낸 attribute를 비동기 실행 요청을 받는 thread에게 전달하는 기능을 추가 합니다.
앞서 테스트 결과를 통해 설명하자면, test()는 http-nio-8080-exec-1 thread에서 실행됐고 method2()를 호출 했습니다. 호출 후 method2()가 ExecutorWithSession-1 thread에서 비동기로 실행 되기 직전까지의 과정을 잠시 살펴보겠습니다.
method2()를 실행하라는 내용을 가진 task라는 변수명의 runnable을 HandlingExecutor.execute() 로 전달합니다.
위의 코드에 포함된 내용이지만 구간별로 나눠서 설명을 하기 위해 HandlingExecutor.execute()의 내용을 한번 더 기술하겠습니다.
    public class HandlingExecutor implements AsyncTaskExecutor {

        private AsyncTaskExecutor executor;

        ...(생략)

        @Override
        public void execute(Runnable task) {
            Runnable runnable = createWrappedRunnable(task);
            executor.execute(runnable);
        }
        ...(생략)

    }
전달된 runnable은 createWrappedRunnable()를 통해 wrapping 된 후 AsyncTaskExecutor.execute()에 의해 비동기로 실행됩니다.
비동기로 실행되기 전에 wrapping이 이뤄졌음을 기억해주시기 바랍니다. 그러면 이제 아직 비동기로 실행되기 전의 wrapping 과정을 살펴보겠습니다.
    public class HandlingExecutor implements AsyncTaskExecutor {

        ...(생략)

        private Runnable createWrappedRunnable(final Runnable task) {
            Attribute attr = SessionScopeUtil.getAttribute();

            return new AttributeAwareTask(new Runnable() {
                @Override
                public void run() {
                    try {
                        task.run();
                    } catch (Exception ex) {
                        handle(ex);
                    }
                }
            }, attr);
        }
        ...(생략)

    }
SessionScopeUtil로부터 받은 attribute를 runnable과 함께 AttributeAwareTask로 wrapping합니다.
이 때는 비동기로 실행되기 전이기 때문에 SessionScopeUtil로부터 받은 attribute는 http-nio-8080-exec-1 thread의 HttpServletRequest로부터 받은 attribute 입니다.
이렇게 wrapping된 runnable은 리턴되어 AsyncTaskExecutor.execute()에 의해 비동기로 실행됩니다.
    public class AttributeAwareTask<T> implements Callable<T>, Runnable {
        private Callable<T> callable;
        private Runnable runnable;
        private Attribute attribute;

        ...(생략)

        @Override
        public void run() {
            AsyncScopeUtil.setAttribute(attribute);
            try {
                runnable.run();
            } finally {
                AsyncScopeUtil.removeAttribute();
            }
        }
    }
비동기로 실행되었으니 현재는 ExecutorWithSession-1 thread로 무대가 바꼈습니다. 새로운 무대에서 아까 전달받은 attribute를 AsyncScopeUtil에 보관합니다. 그러면 method2()에서 SessionSopeUtil의 트릭을 통해 attribute를 꺼낼 수 있게 됩니다.
runnable이 실행된 후 AsyncScopeUtil에서 아까 보관한 attribute를 제거합니다. 만약 제거 과정을 빠뜨리시면 memory leak이 발생됩니다.
SessionScopeUtil & AsyncScopeUtil
위의 설정만으로는 설명이 부족하고 SessionSopeUtil과 AsyncScopeUtil의 트릭에 대한 설명이 필요합니다.
AsyncScopeUtil
AsyncScopeUtil은 static으로 선언된 Map에 thread ID를 key로하여 자료를 관리합니다.
동일한 thread 내에서는 Controller-Service-Dao 중 어느 곳에서든지 attribute를 보관하고 꺼내서 사용하게 해줍니다.
public class AsyncScopeUtil {

    private static final Map<String, Attribute> attributeMap = new HashMap<>();

    public static Attribute getAttribute() {
        return attributeMap.get(Long.toString(Thread.currentThread().getId()));
    }

    public static void setAttribute(Attribute attribute) {
        attributeMap.put(Long.toString(Thread.currentThread().getId()), attribute);
    }

    public static void removeAttribute() {
        attributeMap.remove(Long.toString(Thread.currentThread().getId()));
    }
}
SessionScopeUtil
import org.springframework.web.context.request.RequestAttributes;
import org.springframework.web.context.request.RequestContextHolder;

public class SessionScopeUtil {

    public static Attribute getAttribute() {
        try{
            return (Attribute) RequestContextHolder.getRequestAttributes().getAttribute(Attribute.KEY, RequestAttributes.SCOPE_SESSION);
        }catch(Exception ex){
            return AsyncScopeUtil.getAttribute();
        }
    }

    public static void setAttribute(Attribute attribute) {
        RequestContextHolder.getRequestAttributes().setAttribute(Attribute.KEY, attribute, RequestAttributes.SCOPE_SESSION);
    }

    public static void removeAttribute() {
        RequestContextHolder.getRequestAttributes().removeAttribute(Attribute.KEY, RequestAttributes.SCOPE_SESSION);
    }
}
SessionScopeUtil.getAttribute() 에 핵심 트릭이 있습니다. ThreadPoolTaskExecutor이 가진 thread 들은 HttpServletRequest를 가지고 있지 않기 때문에 exception이 발생하게 되고 AsyncScopeUtil.getAttribute() 가 호출됩니다. 원래 SessionScopeUtil은 동일한 Session ID를 갖는 WAS간의 자료 공유를 위한 유틸리티 입니다. 하지만 비동기 thread에도 그 정보를 전달할 수 있는 기능을 제공하게 되었습니다.
주의사항
HttpSession에 보관된 정보를 변경하는 것은 최소한으로 하는 것이 좋습니다. 예를들어, 로그인 할 때 필요한 정보들을 보관하고 로그아웃 할 때 모든 정보들을 제거하는 정도가 좋다고 생각합니다. 결론적으로 업무로직에서는 SessionScopeUtil의 getAttribute()만 사용하는 것을 권장합니다. 특히나 비동기로 처리 되면 multi-thread 혹은 multi-process로 동일한 HttpSession을 바라보게 될텐데 쓰기를 진행하는 것은 바람직하지 않습니다.
두번째 주의사항은 비동기 thread로 전달하는 대상은 value 혹은 VO여야 합니다. HttpServletRequest, HttpSession와 같은 servlet의 thread와 동일한 thread를 갖는 대상을 전달해선 안됩니다. 그렇지 않으면 servlet의 thread가 비동기 thread 보다 먼저 종료되어 발생되는 문제를 접하게 되실 겁니다.
Thank You
간단한 내용이라고 생각했는데 상당히 긴 글이 되어버렸습니다. 끝까지 읽어주셔서 고맙습니다.
Associated Posts
관련된 주제를 살펴볼 수 있도록 동일한 Tag를 가진 글들을 모아뒀습니다. 제목을 눌러주세요.-
Spring Boot Configuration & Kubernetes ConfigMap: OS 환경변수 바인딩


( Image reference : https://upload.wikimedia.org )이 글은 OS 환경변수를 Spring Boot의 프로퍼티에 바인딩하는 방법을 다룹니다.
그리고 그 방법을 이용해서 Kubernetes configmap을 Spring Boot 프로퍼티에 바인딩 하는 방법도 다룹니다.이를 이용해서 프로퍼티를 더 간단하고 유연하게 관리 가능합니다.
로컬환경에 필요한 프로퍼티는 application.yml로 관리하면되고
개발환경, 운영환경 등에 필요한 프로퍼티는 각 OS 환경변수 혹은 Kubernetes configmap을 활용해서 관리합니다.... 더 읽기 -
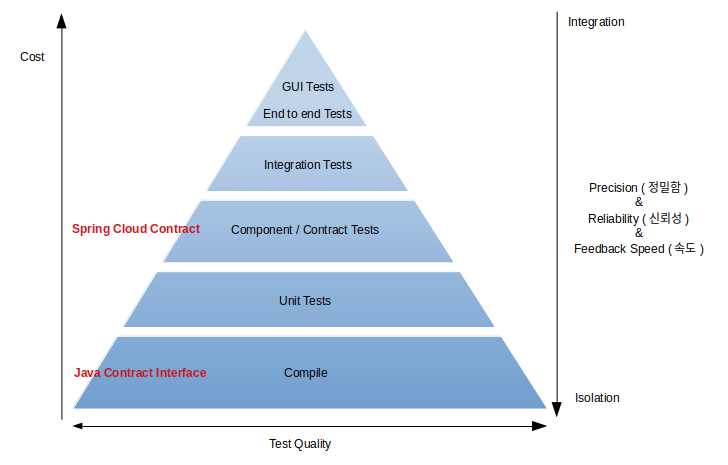
Contract Test 없이 MSA 도전 : Contract Interface

API 제공자(Provider), 소비자(Consumer) 모두 컴파일 단계에서 계약(Contract)의 API spec을 검증할 방법을 제안합니다.
기존에 component, contract 테스트에서 받을 수 있었던 피드백을 컴파일 단계에서 받게되어 개발속도가 크게 향상됩니다.... 더 읽기 -
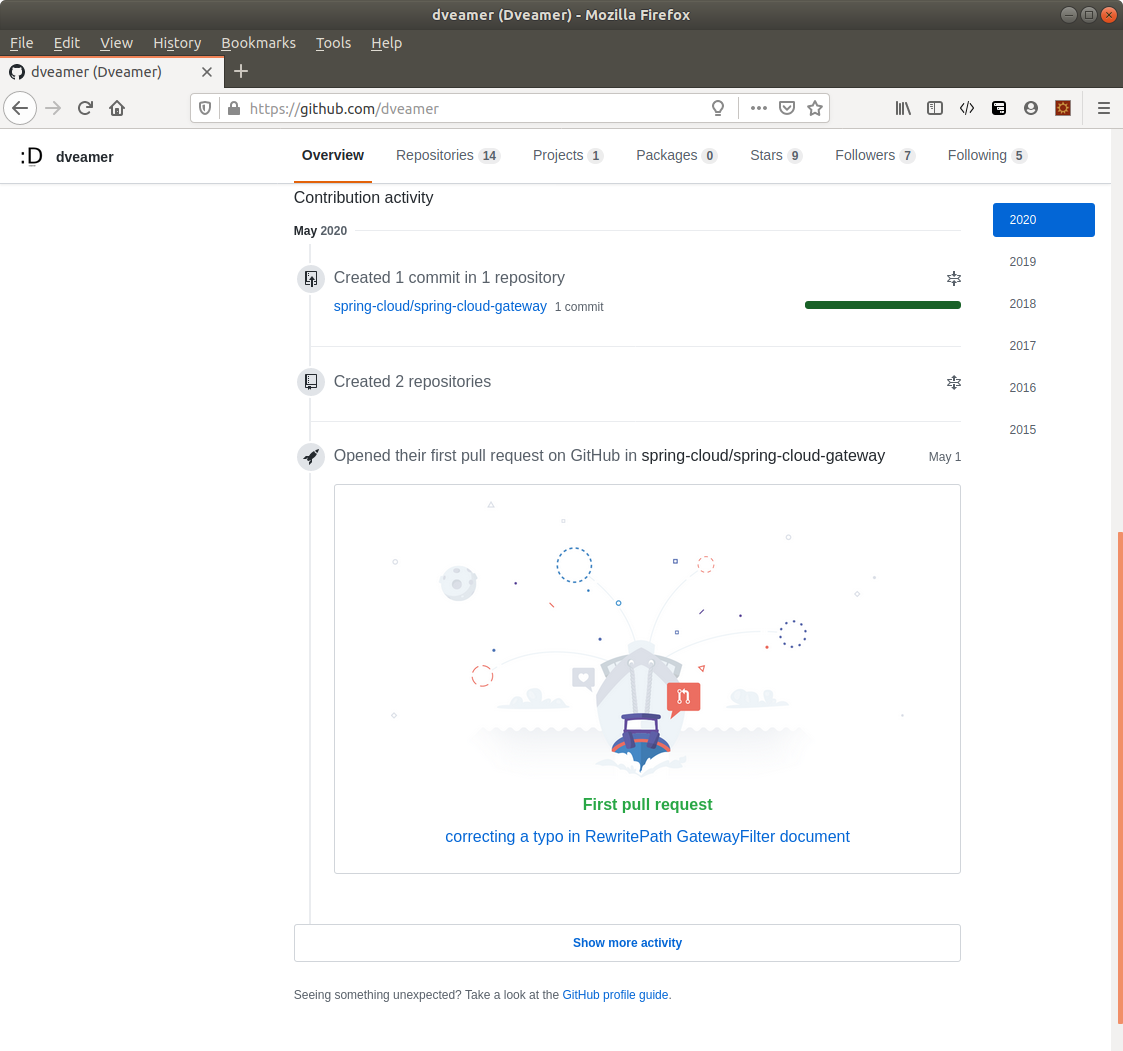
나의 첫 Pull Request : Spring Cloud Gateway
나의 첫 pull request를 보냈다.
그리고 얼떨결에 Spring Cloud Gateway contributor가 되어버렸다.... 더 읽기 -
Spring Cloud Gateway - Resilience4j, Kubernetes
-
All Properties Of Spring Boot, Spring Cloud
-
Spring Boot, Spring Cloud의 설정정보 모음
-
Spring Boot Auto Configuration 설정과 원리
-
Spring Boot Starter & Parent 로 간단히 의존성 설정하기
-
중복 로그인 방지 in Session Clustering Env
-
Spring RequestContextHolder - 어디서든 HttpServletReqeust 사용하기
-
Spring @Cacheable Cache 처리
-
Spring @Async AspectJ 비동기처리
-
Spring @Async 비동기처리


